
Graveyard Keeper 2 Zombies: Unlock → Work → Optimize (One Hub)
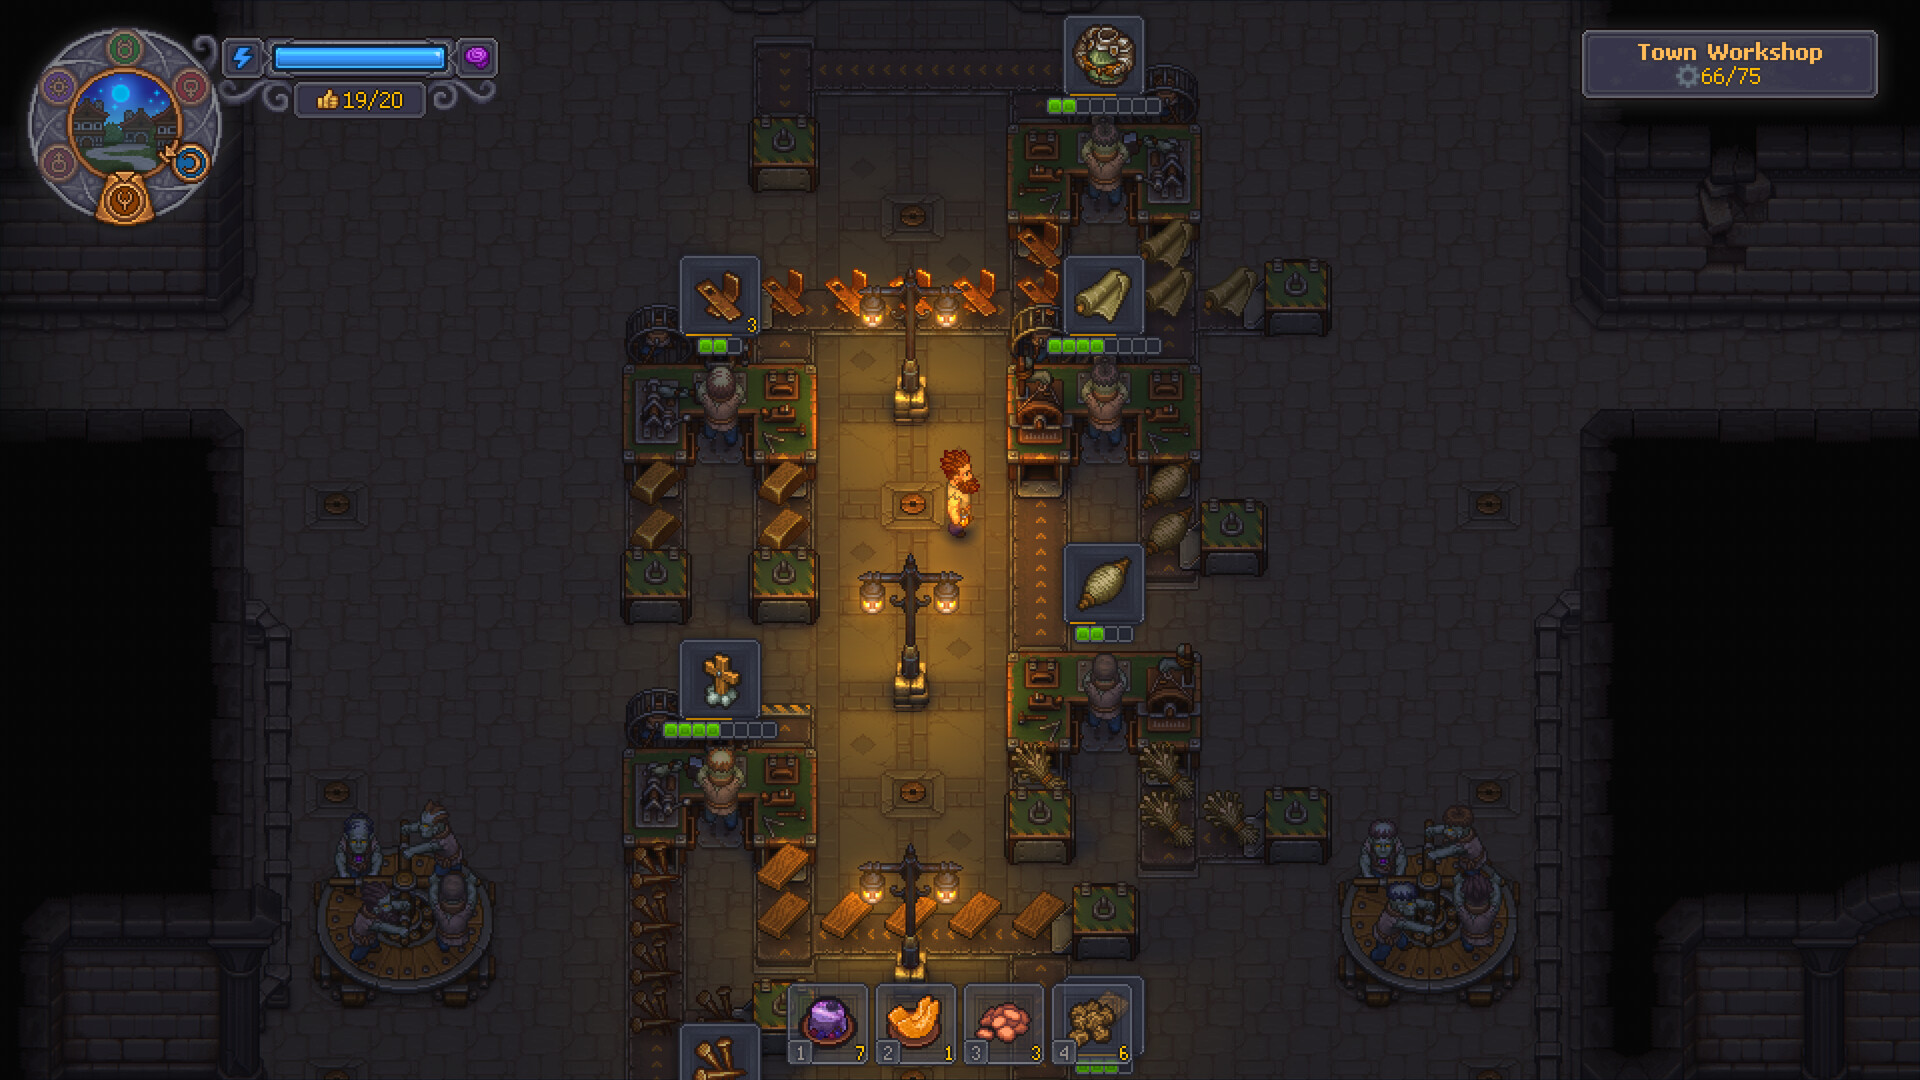
Checked for Graveyard Keeper 2 · patch 1.005 — numbers may change; re-check after updates.
This Graveyard Keeper 2 hub takes you from no zombies → workers producing → know what to optimize next. Competitors split unlock, resurrect, and assign across separate articles; we keep one pipeline.
TL;DR — Zombie pipeline stages
| Stage | Job | Done when | Deep link |
|---|---|---|---|
| 1 Unlock | Clear Dream Dust / Plague Doctor gate; open Resurrection Lab path | Gate complete; lab accessible | Dream Dust |
| 2 First workers | Build Resurrection Table; prepare corpse; resurrect on powered day | ≥1 zombie exists and can be carried / commanded | This page Stage 2 |
| 3 Put to work | Equip tool, assign station, queue work, watch one cycle | Zombie performs a real job without constant reset | Stage 3 |
| 4 Optimize | Collars, corpse quality, red-skull intro | You know when “any worker” vs “better corpse” matters | Stage 4 → Autopsy · Red Skull Zombies |
| 5 Automate | Supplier / porter / factory readiness | Checklist started; layout not chaos | Automation |
Stage 1 — Unlock gate (Dream Dust / Plague Doctor)
Do not duplicate the full reagent checklist here.
| Check | Status |
|---|---|
| Know why Dream Dust matters | It clears the Plague Doctor conversation that opens alchemy + early zombie rewards |
| Prerequisites (NPC / basement / tower) | Follow the consolidated steps on Dream Dust |
| Plague Doctor unlock complete | Early free zombies may be granted as quest rewards; still open the Resurrection Lab for ongoing workers |
| Alchemy DB rabbit hole | Out of scope — link Wikily alchemy only after the gate is clear |
Common fail: Skipping Study Table research before brewing Dream Dust — re-check the Dream Dust page before blaming the Resurrection Table.
Stage 2 — Resurrection Lab, table & first workers
High-level steps (confirm labels on your build):
| Step | Action | Done when |
|---|---|---|
| 1 | Open the Morgue door into the Resurrection Lab (common costs cited: 1 Bronze Detail + 1 Melted Fat) | Lab room accessible; starter chest often has Reanimation Liquid + Bronze Zombie Collars |
| 2 | Research Reanimation on the Anatomy & Alchemy tree (revealed after repairing / progressing the resurrection device; needs Alchemy/Distillation and related prereqs) | Resurrection Table I blueprint available |
| 3 | Build Resurrection Table I in the Morgue (common build: 2 Oiled Planks, 4 Polished Stone, 3 Glass) | Table interactable |
| 4 | Prepare a complete corpse (vital organs present) with 1 Reanimation Liquid + 1 Zombie Collar on the table | Prepare / strap succeeds |
| 5 | Activate the Resurrection Device when the lab is powered — commonly on Envy day (storm / green calendar mark), or via Prayer for Storms when that effect is active | Zombie spawned |
| 6 | Confirm first free/early workers from quest rewards vs crafted labor | You know starter labor vs ongoing resurrection |
Vital organs: Keep the core body-part set intact. Soft pocket parts (Blood / Flesh / Fat) are a different category — missing a core part commonly blocks prepare/resurrect.
Error messages: Do not trust invented toast text from other sites. Read the on-screen reason (missing part, zombie limit, power spent, collar mismatch). Steam Update 1.005 fixed several Resurrection Table / “cannot resurrect despite requirements met” cases — update before debugging forever.
Stage 3 — Put zombies to work
| Topic | Practical rule |
|---|---|
| Equipment | Open the zombie inspection menu and give the required tool for the job; tools raise the matching Work Mastery track |
| Assignment | Carry the zombie to a workstation that accepts zombie labor; place it and queue a recipe the zombie can perform |
| Mastery | If a craft is locked, pending crafts often show when skill level is too low — train or pick a simpler recipe |
| Pathing | Keep beds / stations / storage reasonably close; blocked routes idle workers |
| Inputs / outputs | Empty input chests or full output storage stop the loop — fix logistics before hiring more bodies |
| Babysitting | Watch one full work cycle before mass-hiring |
Screenshot slots: assign UI; zombie walking to station; blocked path example.
Stage 4 — Collars, quality, red skulls (intro)
| Topic | What to tell players | Do not invent |
|---|---|---|
| Collars | Gear that must support the corpse’s red-skull count; craft at the Jewelry Table | Treat any guide’s bonus % as gospel without tooltip check |
| Corpse quality | Better prep on Autopsy → better candidates | Organ → skull math dumps here |
| Red skulls | Each red skull opens a perk slot on the resurrected zombie | “5 red = X% output” fabrications |
| When to care | After basic workers exist and a station is bottlenecked | Min-max before first zombie |
| Deep optimize | Red Skull Zombies spoke | Full craft encyclopedia on this hub |
Collar ranges commonly cited (confirm on tooltip after patches):
| Collar | Typical red-skull support range (public guides as of 2026-09-26) |
|---|---|
| Bronze Zombie Collar | Lower early range (guides often cite up to 5) |
| Golden Zombie Collar | Mid range |
| Steel Zombie Collar | High / effectively uncapped for practical use |
Editorial stance: First worker > perfect worker. Optimize when a real bottleneck appears.
Stage 5 — Toward Supplier / Porter / factory
Once several zombies work reliably:
- Stop expanding chaotic manual assigns.
- Open the mid-game checklist: Graveyard Keeper 2 Automation.
- Unlock relevant techs in priority order → Tech Tree Priority.
- Keep feeding better corpses from autopsy triage when a role is important → Red Skull Zombies.
Supplier / Porter / factory module names: use the in-game and Wikily labels on the automation page.
Troubleshooting table
| Symptom | Likely cause | Fix direction |
|---|---|---|
| Can’t resurrect at all | Gate incomplete / lab door locked / Reanimation not researched | Re-run Dream Dust + Stage 2 checklist |
| Table won’t Prepare | Missing vital organ / missing liquid or collar / zombie limit | Inspect corpse completeness; check lab limit UI |
| Device won’t fire | Wrong day / power spent / Prayer for Storms inactive | Wait for Envy power or storm prayer window |
| Zombie exists but won’t work | No job, missing tool, pathing, empty inputs | Re-assign; clear path; check tools and chests |
| Works once then idles | Storage full / input empty / mastery too low for queued craft | Fix I/O; lower recipe tier |
| “Wrong corpse” feeling | Yard-quality body forced into labor (or reverse) | Separate yard vs worker goals on Autopsy |
Done when checklist
- [ ] Dream Dust / Plague Doctor gate cleared
- [ ] Resurrection Lab open and Resurrection Table built
- [ ] ≥1 zombie prepared and resurrected on a powered day
- [ ] ≥1 zombie assigned to a real producing station
- [ ] One full work cycle observed without soft-lock
- [ ] You know when to improve corpses vs hire “any” worker
- [ ] Automation readiness page opened for next stage
FAQ
Q: How do I unlock zombies at all?
A: Clear the early Dream Dust / Plague Doctor gate (often grants early free workers), then open the Resurrection Lab and research Reanimation for ongoing resurrection. Detailed craft/unlock steps live on Dream Dust.
Q: What do I need before the Resurrection Table is useful?
A: Lab access, Reanimation researched, a complete corpse, Reanimation Liquid, a suitable Zombie Collar, and a powered resurrection window (commonly Envy day).
Q: How do I assign a zombie to a job?
A: Equip the required tool, carry the zombie to a compatible workstation, place it, and queue a recipe it can perform. Confirm tools and a clear path, then watch one cycle.
Q: Why won’t my zombie work / what are common errors?
A: Usually missing assignment, tools, inputs/outputs, mastery, or pathing. Read the on-screen reason — see the troubleshooting table. Do not trust invented message text without matching your UI.
Q: When should I care about red skulls vs just any worker?
A: After basic labor exists and a station is the bottleneck. Each red skull opens a perk slot conceptually; precise thresholds belong on Red Skull Zombies. Prep bodies on Autopsy.
Q: What’s next after basic workers?
A: Supplier/porter/factory automation checklist → Automation, with tech gates on Tech Priority.
Q: Is this the full red-skull crafting guide?
A: No — intro only. Deep optimization is the red-skull spoke.
Also read
- Graveyard Keeper 2 Beginner Guide — when zombies fit Week 1
- Graveyard Keeper 2 Autopsy & Skulls — which corpses become workers
- Graveyard Keeper 2 Dream Dust — unlock gate steps
- Graveyard Keeper 2 Red Skull Zombies — worker optimization
- Graveyard Keeper 2 Automation — supplier/factory checklist
- Graveyard Keeper 2 Tech Tree Priority — unlock gates for workers/factory
Reference
- Wikily — Zombies for reference stats
- Wikily — Reanimation · Resurrection Table I
- Fextralife — Zombie Resurrection